Add Panopto to course room in Canvas
Panopto should automatically be enabled and appear in the course navigation. In the event that it does not appear in the left-hand navigation, follow these steps to add it to the course. You will need course convenor or equal status to do this.
1. If the option for Panopto does not appear in the left-hand navigation of your course, select Settings (Fig. 1).

Fig. 1
2. Select the Navigation tab, and check to see if Panopto falls under the section Drag items here to hide them from students and is greyed out. If so, drag and drop it up into the course navigation and select Save. (Fig 2)

Fig 2
3. Panopto Video will now appear in your course's left-hand navigation
Creating a new recording
1. In the Panopto Video window in Canvas select Create
2. In most cases you will be on a UiO pc and you will select "Panopto for Windows" and then "Open Panopto" in the new window that opens. There are options for recording directly in a web browser and recording on a Mac
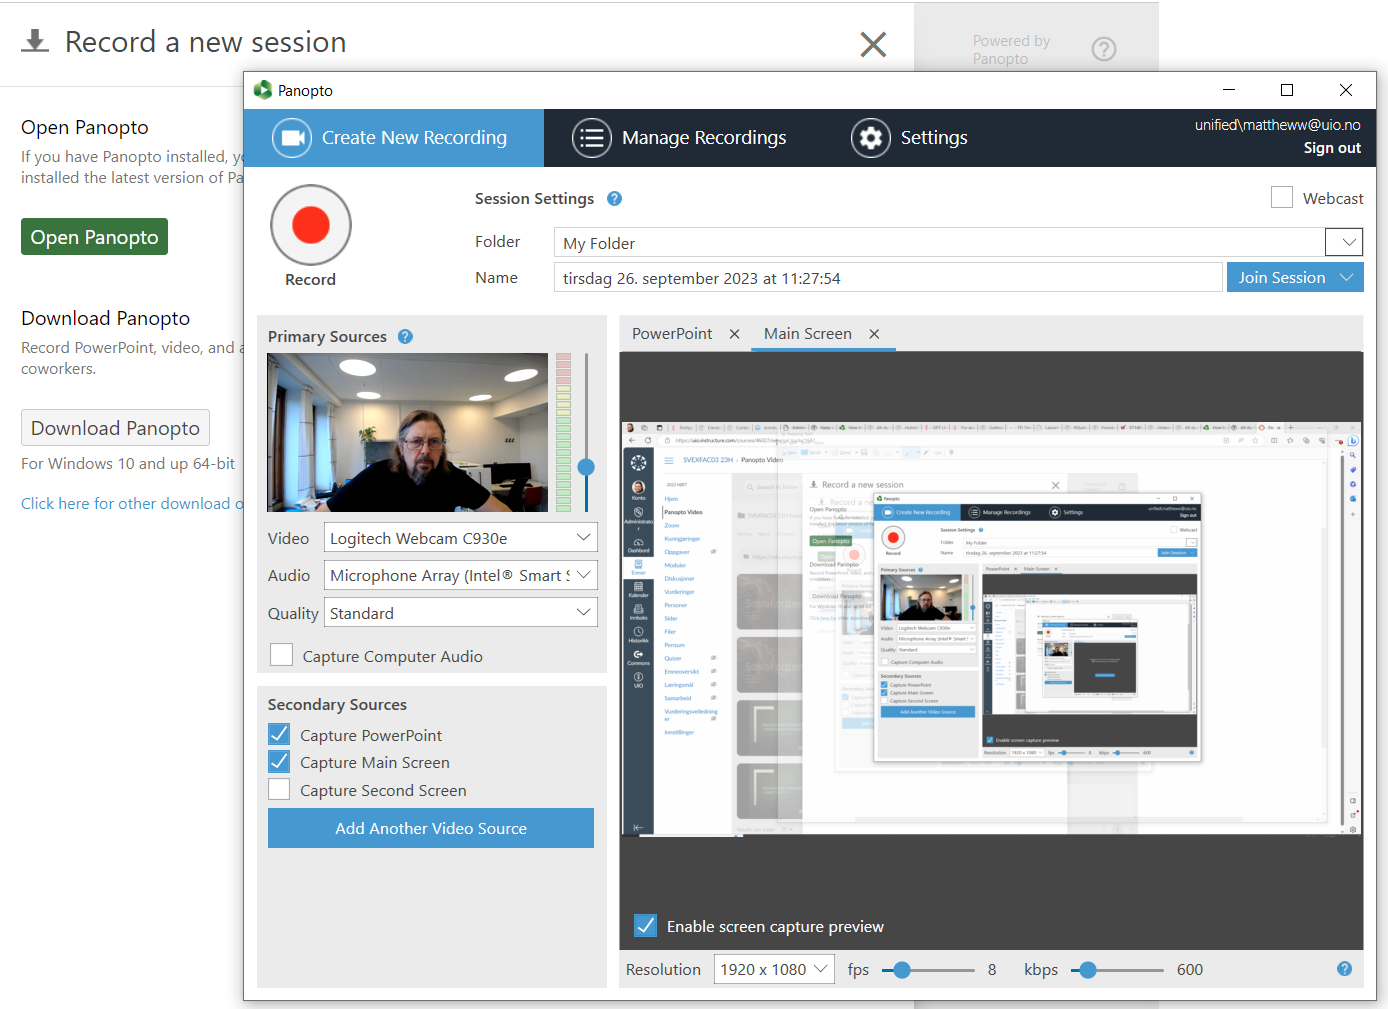
3. The Panopto application that is installed in the pc will now open (see fig 3)

Fig 3
Choosing your sources
- Name your recording
- Select your sources
- Video: Choose your camera (or none). If you select Document camera, increase the quality level to high or above to record with sufficient resolution.
- Audio: select your microphone and check the level in the volume bar
- Secondary sources: If you have a Powerpoint presentation open Panopto will automatically integrate it and open it when you start recording, if you have selected the Powerpoint option. Main screen, i.e. your pc screen, can also be chosen if you intend to use several applications during the recording.
- You're ready to start recording.
Recording your lecture
- Press the red record button to start your recording (your Powerpoint presentation will start automatically and you're ready to start teaching).
- It is recommended that you record your lecture in two sessions. End the recording after the the first hour, and then start a new recording with the same settings (and a name to reflect it is part 2 of the lecture) in the same way as before.
- Panopto uploads the recording while you are recording and the upload should be complete within a minute or two of the lecture finishing.
Adding captions to your recording
Captions are set as default to not be available for students due to the poor quality of automatic generated captions in Panopto (although English laguage captions are not too bad).
But there are two ways to make the captions of good quality:
- The first is to edit the captions that can be automatically generated within Panopto.
- Import the automatically generated captions. See How to Add ASR (Automatic Speech Recognition) Captions into a Video (panopto.com)
- Correct the automatically generated captions manually - How to Edit or Delete Captions (panopto.com)
- The other method is to use UiO's own Autotekst (uio.no) service. This gives a much better result which requires very little further work:
- Download the audio file from the Panopto recording as an mp4 file - How to Download Video or Audio Streams as MP4s (panopto.com) (see point 2 on the page).
- Upload the file to Autotekst (uio.no) and generate the captions. If necessary refer to the guide on how to Generate text from audio and video fil in Autotekst - University of Oslo (uio.no). Select .srt or .vtt as your file format.
- You can now upload the caption file in Panopto - How to Upload a Caption File for a Video (panopto.com)
- Correct any mistakes in the caption file within Panopto - How to Edit or Delete Captions (panopto.com)
Simple editing of your recording
If you wish to remove a section of the recording (where a student has been recorded, for example) you can easily cut it out of the published recording. It's best to do this before generating and adding captions. See How to Trim a Video in the Editor (panopto.com)